
Cabling Cleanup at Rack Enclosure
Over time network cabling can become a rat’s nest of cables. Keeping the cables tidy and organized is critical to troubleshooting and management.
- Do you have a clean well-organized network cabling rack?
- Can you find and change an existing connection without disrupting other connections?
- Do you have a situation where airflow is restricted?
- In an emergency, will you be able to quickly find and fix the problem?
If you answered “no” to any or all of these question, your rack needs work.
What needs to be done:
- Analyze the nature of your mounted hardware so that switches and patch panels are properly located next to each other with room for future expansion.
- Deal with heat by creating 1U space between passively cooled devices like switches while isolating servers that actively release hot air.
- Shorten the patch cables by staggering patch panels and switches in the rack.
- If you are using vertical power distribution strips/UPSs, place them along the side that is closer to the majority of power outlets of rack-mounted devices.
- Use custom short patch cable lengths of 6″ or 1′ when possible. Minimize the slack while maintaining strain relief at the connectors.
- Use velcro. When you need to make a change, plastic ties need to be cut and then replaced. Avoid using them on your rack.
- Consider removing the covers on your server. That will help with airflow.
- If you have any hot-swappable components, be sure to not interfere with their access.
- Route the cables 90 degrees to the side and then down as to avoid creating too much stress on the connection.
- Color-code your cables to delineate functionality among data, voice, cam, security and such.
- Limit access to your rack cabinet and insure that they are familiar with your topology and standards.
- Keep a modest inventory of extra patch cable of varying lengths.
- Do not allow for “temporary cables.” Do it right the first time.
Following these rules we result in a decrease in downtime and an increase in efficiency when it comes time to add new cables or troubleshoot a problem.
If you need help, contact us and we will schedule a site visit.
-
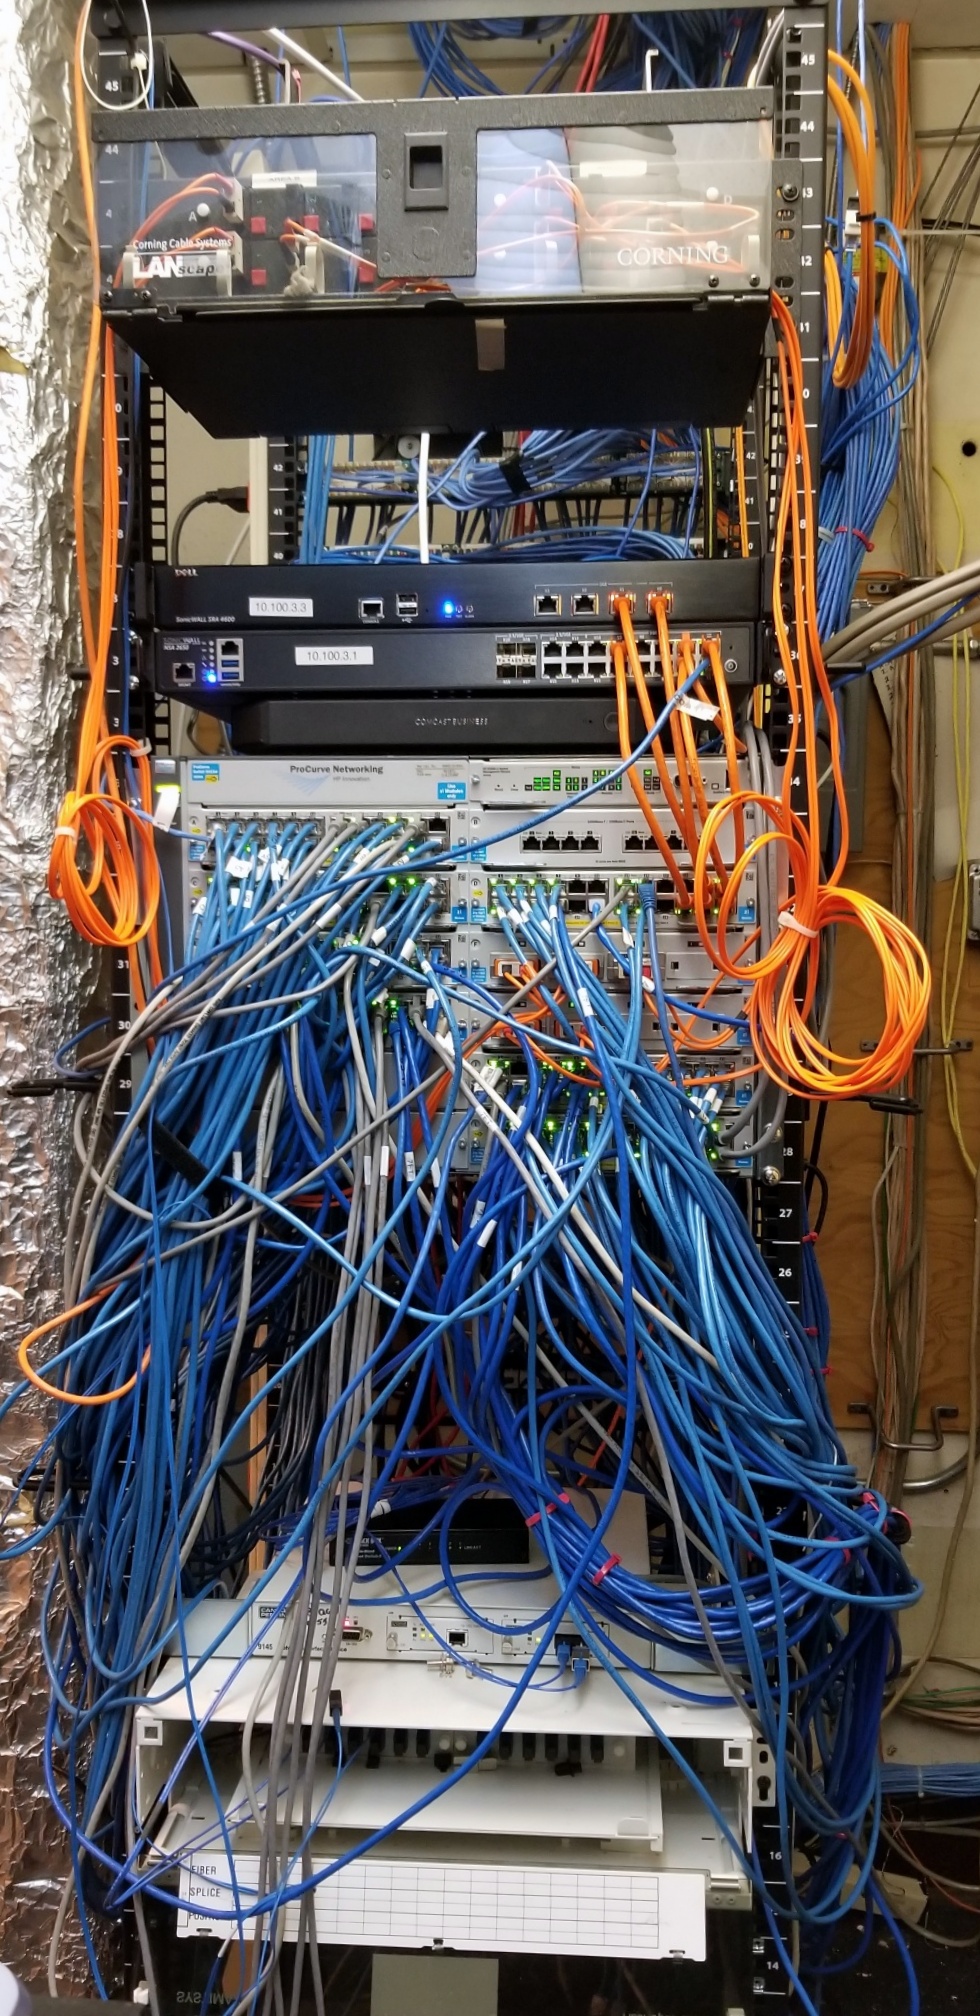
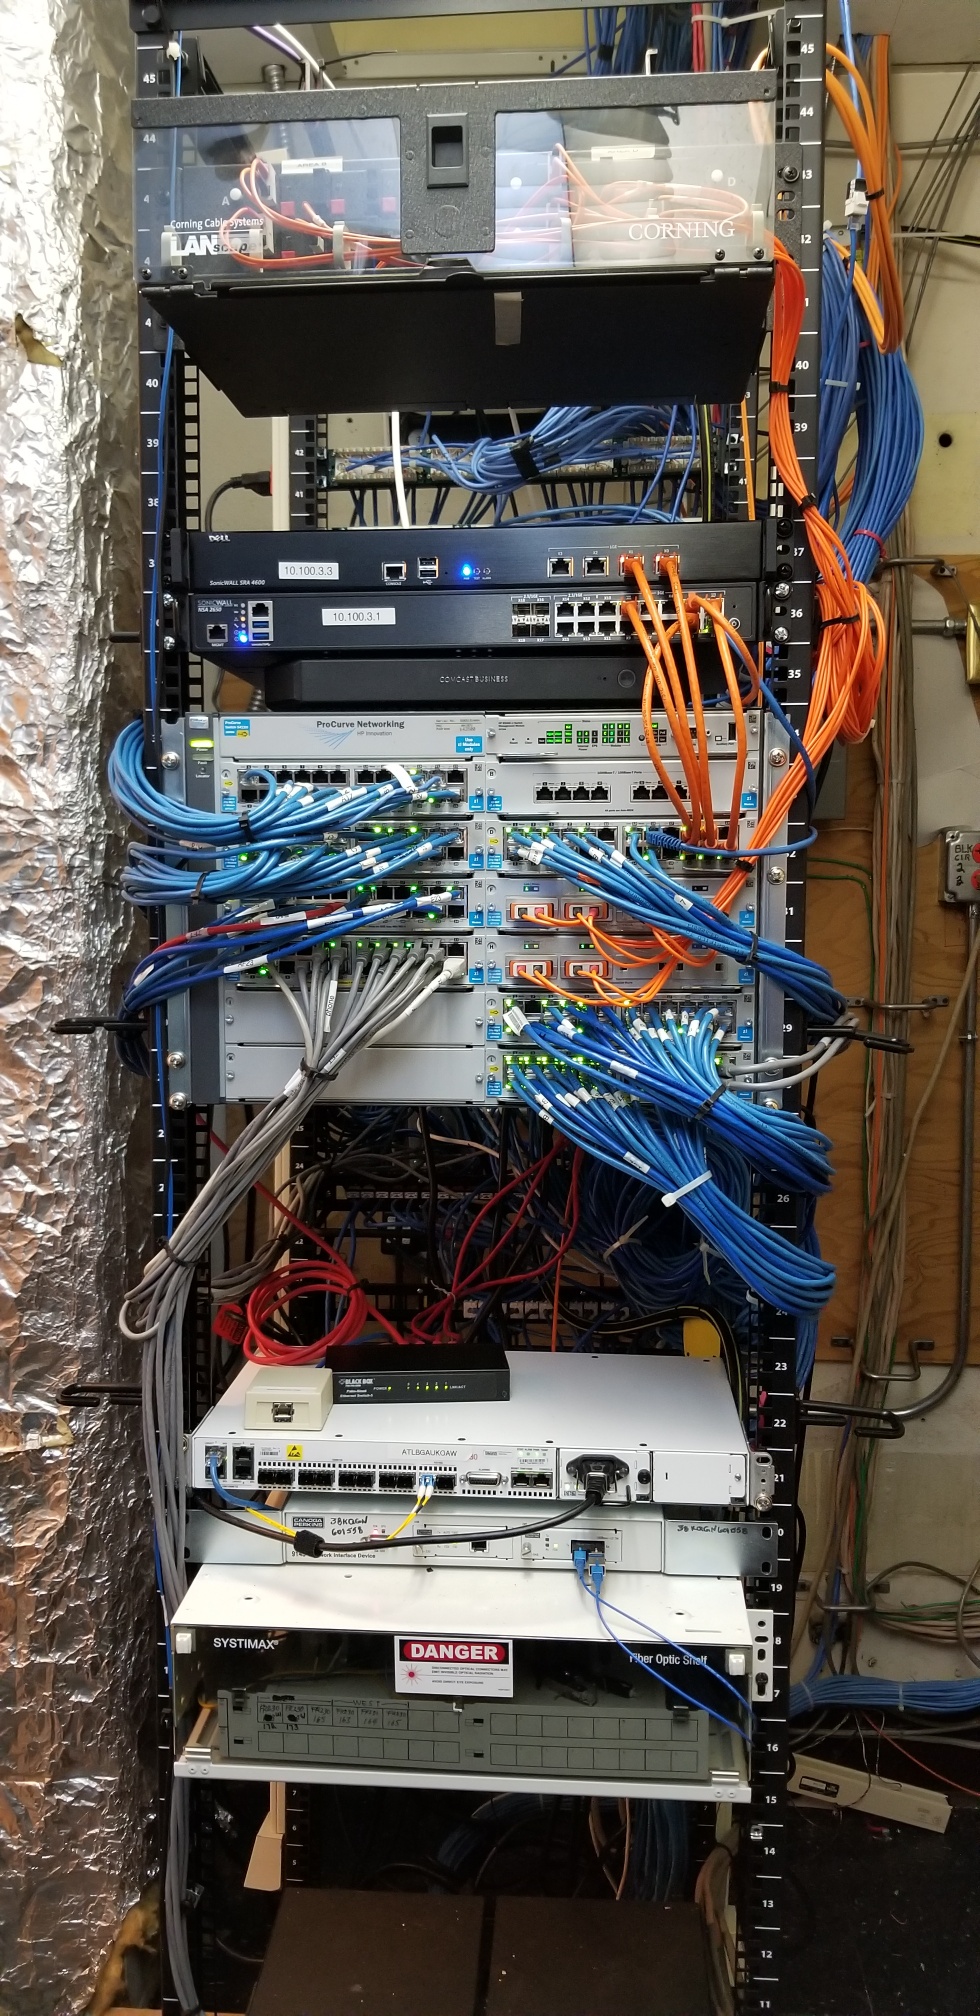
Before Cabling Rack Cleanup After


