Typical Installation Mistakes of Network Cabling – Part 2
 As discussed in Part 1, network cabling installation errors may result in long-term problems and high costs. They can be avoided by following standard structured cabling practices. Continuing with the discussion of typical network cabling installation mistakes, Part 2 will cover Ignoring Regulations, No Testing, and Skimping On Labor.
Ignoring Regulations
There are codes, laws, and ordinances that regulate low voltage cabling, and they vary, depending on the municipality, city, and state. Experienced professionals who install network cabling are knowledgeable about the applicable requirements and how to complete a project to code. When the fire marshal or building inspector determines laws were broken or wiring is not up to code, a company can be penalized with large fines and required to remove and reinstall cabling if it is a fire hazard.
No Testing
When network cabling is installed, each cable should undergo testing. This should also involve the verification of a cable’s length and specifications. This process is crucial because it will confirm whether or not the network satisfies project specifications. The data also provides a basis for future testing and troubleshooting, along with supporting any warranty claims.
Skimping On Labor
Considering how important the network cabling installation is to the future, cutting corners in the hiring of cabling installers is unwise. It is crucial to always verify the qualifications and licensing of the cabling installation company you are considering. Make the time and effort to check each reference that is provided. This may save your company time, money, and problems if you avoid working with an outfit that provides substandard services support. Request the contact information of previous customers who had projects similar to yours and get their opinions before making a commitment. Finding an installer that is the right fit for your project is the first step for ensuring a successful network cabling installation.
Progressive Office Cabling
Founded in 1986, Progressive Office’s success has been a direct result of years of commitment to seeking solutions on behalf of our clients in the Washington, D.C. and New York City areas. Efficiently working together, Progressive teams get cabling installed and operating as fast as possible while minimizing disruption and downtime. Call our toll free number (800) 614-4560 today.

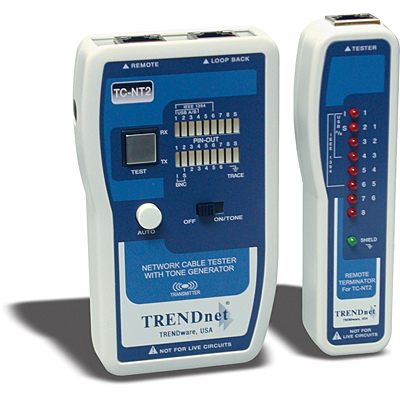
Facts about Data Cable Testing
 Testing always plays a vital role in the process of installing new cables or servicing existing ones. Regular testers for data cabling include length, wire crimper map, attenuation, return loss, and DC loop resistance.
Complex Cabling Needs
Cabling infrastructure requirements have become more complicated. More standards are being developed for cabling professionals in testing and troubleshooting copper and fiber cables. And there are special requirements as well as downsides in the implementation of new technologies. From 10BASE-T to 100BASE-TX to 1000BASE-T and now to 10GBASE-T. It is now more crucial to keep in step with the most up-to-date techniques in cable testing too. In short, cable testing infuses a higher degree of assurance that installed cable links will attain the preferred transmission capacity for your data communications.
Cabling Tester Categories
Cable testing instruments have been manufactured with unique features for specific tasks. Costs, performance, and applications vary. These depend on the required functions. The three main functions are certification, qualification and verification. Although certain attributes overlap, each category answers a particular testing prerequisite.
Certification facilitates conformity to standards defines by the industry. These are instruments signal a “Pass” or “Fail” towards data testing compliance within standardized industry norms. These testing instruments will find out whether a cable link conforms to a category or class such as Cat6 or Cat5e. It is the last step required by most structured cabling installers towards approval of a new installation.
Qualification determines if the existing cable is capable of supporting specific network speeds. This special class of testers is supposed to meet the up-and-coming requirements of network technicians who troubleshoot data networks. These testers perform checks to make a decision on whether a present cable link supports the requirements for fast or gigabit Ethernet. With these instruments, network technicians can identify and isolate cabling issues. While Continuity testers do not perform the series of tests set down by these standards and are not considered certification tools.
Verification makes sure that cabling connections are correct. This type of tool performs a continuity test. It guarantees all wires in the cabling link have been attached properly to termination points at each end. For twisted pair cabling, there is an appropriate pairing of the wires. Such testing tools also confirm wire pairing and find out installation flaws such as split pairs. These can also help in troubleshooting by working with a toner to pinpoint a certain cabling link. These testing tools do not give out any information regarding bandwidth and data integrity.
If you need your cabling tested or certified, contact us!

Cabling Tips for Security Cameras
Cabling is definitely not the showy part of any security system. Nevertheless, it is an essential component of the system. It may seem complicated. There are many considerations in choosing and installing cables to ensure that the security system functions properly. Cables basically provide power for camera installation and transmit signals going back to the digital video recorder (DVR).
Deciding on the Perfect Cabling
Find out whether the system is analog (alternating current frequency has been modified) or digital (electronic technology). Then, you can figure out the proper cable for installation of your security cameras. Or simply refer to the manufacturing specs on the camera system.
The second step is to determine if your camera is powered remotely or connected to a nearby power outlet. It may be necessary to combine power and video cables. Security power and video cables can run next to each other or within one cable jacket. This makes installation easier by pulling one instead of two separate wires.
Make sure to test the cable before you install the CCTV. Examine each cable at the DVR position just to make sure that the cables are working prior to installation.
Cabling Guidelines
Quite often security cameras require coaxial cables to send video from the camera to your recorder. With the RG59 type of coax cable, it is possible to position the camera up to 600 feet away. The RG6 coax cable, on the other hand, may be extended up to 1,000 feet. Cut the cable according to your preferred length but leave an extra service loop of 10 – 20 feet for future flexibility.
What are the steps to follow?
- Make the necessary BNC connection on the cable. This is a small quick round connector primarily for coaxial cables.
- Plug one end of the BNC cable to the camera and the other to your DVR.
- Strip the shield of the power cable to expose the black and red wires. Then, remove the jacket (at least ¼ inch) from each wire.
- Put the wires inside the terminal block at the end of the female power wire plait. It should be red on red wires and black on black wires. Tighten screws on the terminals. Plug the camera into the fitting at the side of the braid.
- Attach wires directly to the positive and negative leads respectively in the power box. Red wire is for positive while black is for negative. This is applicable if you will connect the camera to a multiple camera power supply unit.
- In case you will attach the camera to a single power unit, connect the male power wire braid as well as power supply to the tip of the tress.
Now, the installation is complete and you are ready to use the system.

A Guide to Network Cabling
 While WI-Fi and other wireless network technologies have improved greatly over the years, nothing beats the reliability and performance of a wired network in your home or business. One challenge that people face is what kind of cable they need for their needs.
Although there are dozens of network cable types, the fact is only 3 types of network cable is commonly used in home and small business networks: Category 3 (Cat3), Category 5 (Cat5), and Category 6 (Cat6).

